Dilution Ratio Calculator

Calculate how much stock and diluent you need for a 1:10, 1:100, or custom dilution ratio. The tool handles final-dilution notation, stock-to-diluent parts, concentration targets, and batch setup with overage.

Calculate stock volume, diluent volume, and dilution factor

Enter a ratio or a stock-to-target concentration pair. Results update live, so you can adjust the setup before preparing tubes, wells, or standards.

Start with a common dilution setup

Pick a preset, then adjust the final volume, ratio meaning, sample count, or concentration target.

Dilution inputs

Use ratio mode when the protocol says 1:10 or 1 part stock plus 9 parts diluent. Use concentration mode when you know stock and target concentration.

How should the ratio be read?

Batch setup

Use this section when you need the same dilution for multiple tubes, wells, standards, or replicates.

Diluent

Dilution factor

10×

Stock per sample

10 µL

Diluent per sample

90 µL

Total stock volume

11 µL

Includes 1 sample and 10% overage.

Total diluent volume

99 µL

Add solvent, buffer, media, or nuclease-free water to this amount.

Final concentration

10 µM

This value assumes the stock concentration uses the same unit as the desired final concentration.

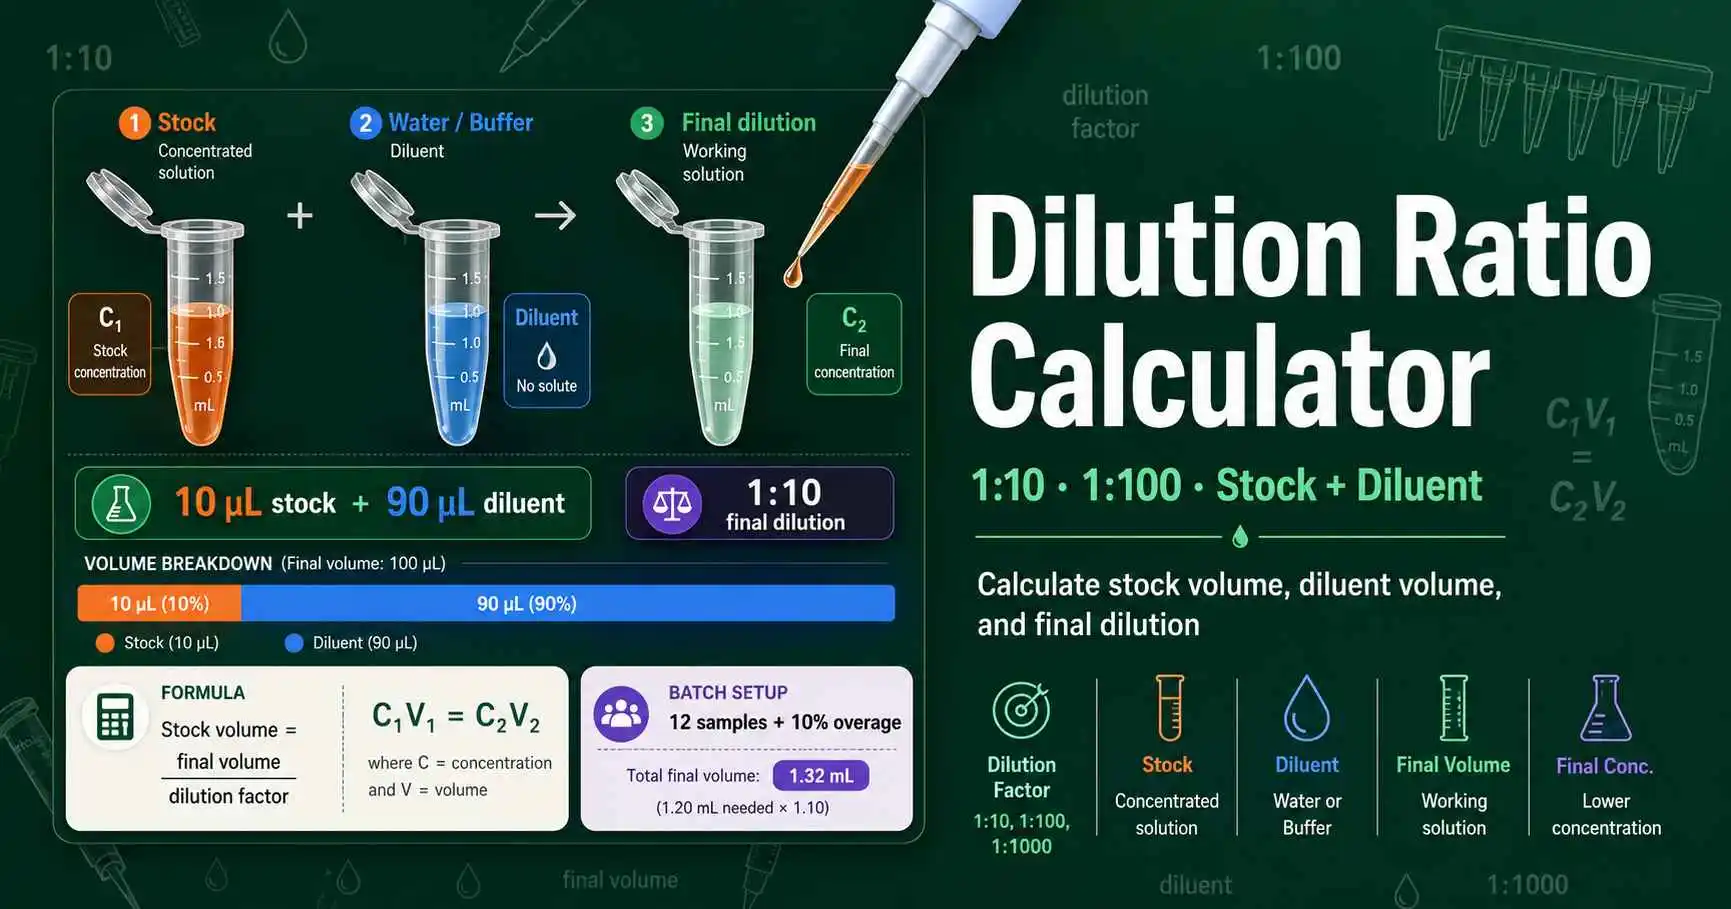
Diagram showing a dilution ratio setup with stock solution, diluent, final volume, dilution factor, and batch overage.
Figure 1. A dilution ratio describes how much concentrated stock enters the final mixture. The figure separates stock volume, diluent volume, final volume, dilution factor, and overage because each value affects pipetting accuracy.

What a dilution ratio means in the lab

A dilution ratio tells you how much concentrated stock remains in a final mixture. A 1:10 final dilution uses one part stock in ten total parts. For 100 µL final volume, that means 10 µL stock and 90 µL diluent.

Protocols do not always use the same notation. Some write “1:9” to mean one part stock plus nine parts diluent. That setup also creates a 1:10 final dilution. The calculator asks which meaning your protocol uses before it calculates volumes.

Use the solution dilution calculator when your problem starts with C₁ and C₂. Use this page when a protocol gives a practical mixing ratio such as 1:5, 1:20, or 1:100.

The formulas behind the result

Final-dilution notation

Stock volume = final volume ÷ dilution factor

A 1:25 dilution in 250 µL uses 10 µL stock.

Stock-to-diluent parts

Dilution factor = (stock parts + diluent parts) ÷ stock parts

A 1:4 stock-to-diluent mix creates a 5× dilution.

What each part of the dilution tool does

Each input answers a specific lab-planning question. Use the table before you prepare a plate, tube series, or assay standard.

Ratio mode

Calculates a dilution from notation such as 1:10 or 1 part stock plus 9 parts diluent.

Concentration mode

Reverse-solves the dilution factor from stock concentration and target concentration.

Final volume

Sets the final amount you want in one tube, well, or reaction.

Sample count

Scales the same dilution across several wells or tubes.

Overage percentage

Adds extra volume to prevent shortage from pipetting losses.

Minimum pipette volume

Flags volumes that may create poor accuracy on standard micropipettes.

Worked examples for common dilution ratios

Prepare a 1:10 DNA template dilution

A PCR protocol asks for a 1:10 template dilution in 100 µL. Enter 10 as the dilution factor and 100 µL as the final volume. The calculator returns 10 µL stock DNA and 90 µL nuclease-free water.

If the original template measured 50 ng/µL, the final tube contains 5 ng/µL. For DNA-specific copy-number planning, move that diluted concentration into the DNA copy number calculator.

Make a 1:100 standard with an intermediate step

A 1:100 dilution in 100 µL requires only 1 µL stock. That volume may work with a calibrated P10, but it leaves little margin for viscous samples. A safer plan makes a 1:10 intermediate tube first.

Use 10 µL stock plus 90 µL diluent for the intermediate. Then dilute 10 µL of that intermediate into 90 µL fresh diluent. This two-step plan gives the same final 1:100 dilution with more reliable pipetting.

When to use ratio, factor, and serial dilution tools

User questionBest calculationExample
“How do I make a 1:10 dilution?”Ratio mode10 µL stock + 90 µL diluent
“What fold dilution did I make?”Dilution factor20 µL stock in 200 µL total = 10×
“How do I create a standard curve?”Serial dilutionSeven 10-fold steps for qPCR standards

Accuracy checks before you pipette

Small stock volumes create large percentage error. If the calculator returns 0.5 µL, prepare an intermediate dilution or increase the final volume. A two-step dilution often gives better accuracy than one tiny transfer.

Keep concentration units consistent. C₁ and C₂ can use µM, mg/mL, ng/µL, or %, but both values must use the same unit before you apply a ratio. LibreTexts explains dilution as adding solvent while the amount of solute stays constant, which is the principle behind C₁V₁ = C₂V₂. Review the dilution concept.

Related dilution tools

Dilution ratio questions

What does a 1:10 dilution ratio mean?

A 1:10 final dilution means one part stock in ten total parts. For 100 µL final volume, add 10 µL stock and 90 µL diluent. Many protocols write this as “1 in 10.” If a protocol says “1:9 stock to diluent,” it gives the same final dilution because 1 + 9 equals 10 total parts.

How do I calculate stock volume from a dilution factor?

Divide the final volume by the dilution factor. A 1:50 dilution in 500 µL uses 500 ÷ 50 = 10 µL stock. The diluent volume equals final volume minus stock volume, so this setup needs 490 µL diluent. The calculator performs this step instantly and checks whether the stock volume is too small to pipette accurately.

When should I use concentration mode instead of ratio mode?

Use concentration mode when you know the stock concentration and the target concentration. For example, a 100 µM stock diluted to 10 µM requires a 10× dilution. Ratio mode works better when a protocol gives a ratio such as 1:20 or 1 part stock plus 4 parts buffer.

Why does the calculator add overage for multiple samples?

Overage prevents short volumes after pipette dead volume, tube-wall retention, and small transfer losses. A 10% overage works well for many small batches. Increase overage when you prepare many wells, use viscous solutions, or pipette sub-microliter volumes.

Can I use this page for DNA, primers, antibodies, and buffers?

Yes. A dilution ratio applies to any stock solution when the stock and target use the same concentration unit. Use it for DNA template, primer stocks, antibodies, buffers, dyes, media additives, and standards. For DNA-specific molarity or copy-number work, use a molecular calculator after you prepare the dilution.

What should I do if the calculated stock volume is less than 1 µL?

Make an intermediate dilution or increase the final volume. Pipetting 0.2 µL directly often creates large percentage error. A safer workflow dilutes the stock first, then uses a larger volume from that intermediate tube. The warning panel flags this issue when the stock volume falls below your minimum pipetting threshold.

Is 1:10 the same as one part stock and ten parts diluent?

No. A 1:10 final dilution means one part stock in ten total parts. One part stock plus ten parts diluent creates eleven total parts, so it gives a 1:11 final dilution. The calculator separates these two meanings because protocols use both styles.